Getting the Best From Black & White Photographs
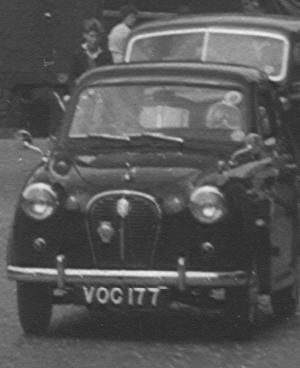
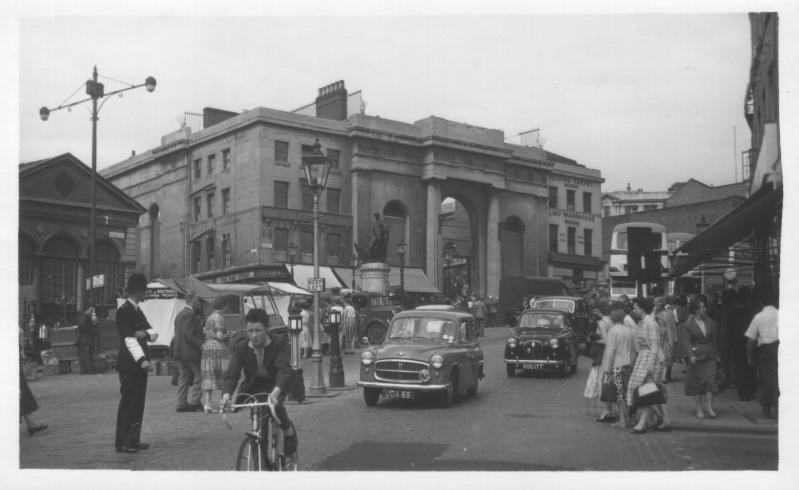
As work on this site progressed, I became more adept at getting the best from my father's black and white photographs. I've struggled to find useful information on the Internet that summarises the kind of process I go through so I thought I'd share my aquired knowledge here. All the software mentioned below was running on an Apple eMac. Some of the applications are not availble on PCs but equivalent programs will suffice.The prints were scanned using a Canon NS-650U. The scanner settings were 600dpi, greyscale. The images were imported directly into Graphic Converter using the Canon Plugin CS-U 3.8X. The raw image was saved to a PICT file. Here is the original image (resized) and a section to show the detail at full resolution:-
 |
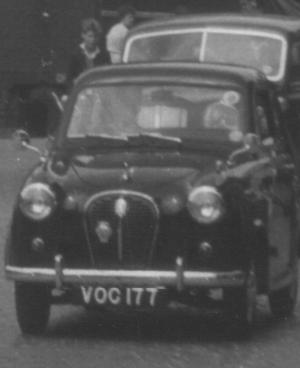 |
The first operation performed was to apply an unsharp mask with the following settings - radius 2.0 pixels, level 80%, threshold 0. The effect of this was often surprising - the amount of detail that popped out made it well worth it! Scanners are known for producing 'soft' images so I would always recommend using an unsharp mask. It's a bit of a black art but do give it a try. I understand it's a feature of some of the software packages that come with certain scanners. It's also in PhotoShop Elements and Paint Shop Pro. Here is the image after the unsharp mask has been applied. You can't see much difference on the full picture because the extra detail has been lost when it has been resized but you should see the effect on the full resolution extract:-
 |
 |
When I started on this website my next operation was to boost the contrast but I later went on to learn about a feature that was to prove a real boon when it came to getting the best results from the prints. Sadly this knowledge was gained too late for many of the pictures of Birmingham but maybe one day I'll get around to enhancing them all... The feature is known as 'Levels'. Apologies to those who have come across this before. I'm going to explain my understanding here - will any experts please let me know if I've got it wrong! Here is the 'Levels...' dialog box from Graphic Converter:-
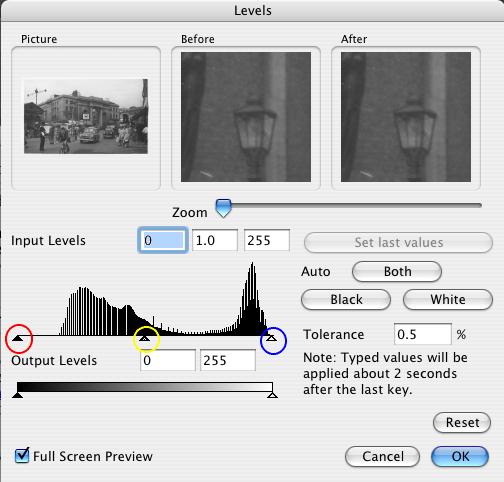
I've marked the three important bits with coloured circles. The pointer in the red circle represents the black level, yellow the midpoint (grey) and blue the white level. Notice how the first 20% of the input levels graph is unused. My understanding is that this represents that the image only has about 200 different levels of grey but the output levels show that these are being spread over 256 different values. This 'dilutes' the shades leading to a washed out appearence. The magic trick is to move the black level pointer to where the actual input levels start (or close to there at least). This is what I mean:-
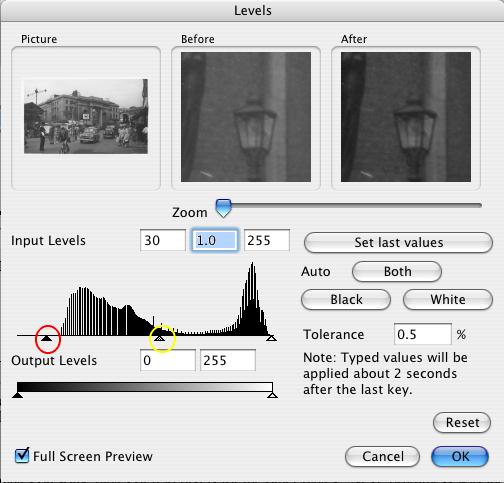
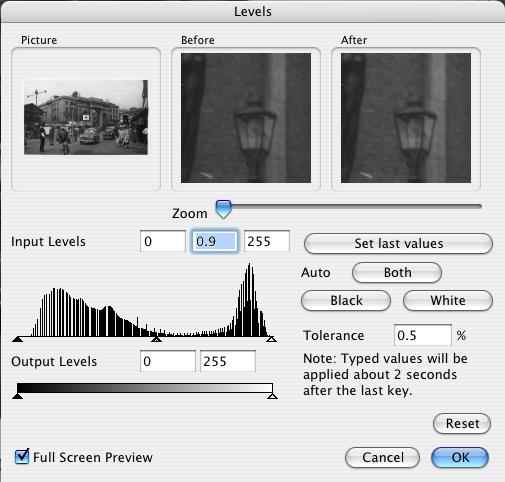
I only dragged the black level pointer (red circle) but the midpoint (yellow) has also moved automatically. Notice how the 'After' preview now has more contrast than the 'Before' one. After confirming this adjustment, re-opening the levels tool shows what has happened. In the dialog shown below, see how the input levels are now spread out almost across the whole graph. Note that the middle input level is shown as 0.9 as I have found that adjusting the midpoint pointer by one step to the right usually provides the best results.
The final step was to increase the brightness slightly. This was necessary due to a mismatch of the gamma value used on Macs vs. that used on PCs. Reluctantly accepting that most people visiting the site would be using a PC I took the pragmatic decision that it was better if the image looked a bit too bright on Macs rather than looking dull and uninteresting on all those PCs. If you're working on a PC you won't need this final step.
OK, let's see the result of all this work. Below is the original scan (resized) and the finished picture after applying the unsharp mask, adjusting the levels and increasing the brightness:-
 |
 |
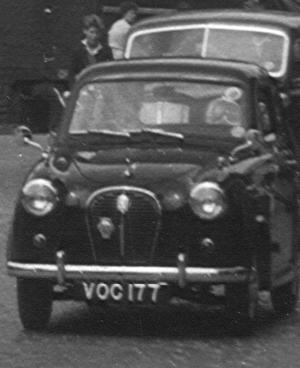
And here is some close up detail:-
|
 |
I hope you agree that the results speak for themselves!
 |
 |